

On this page
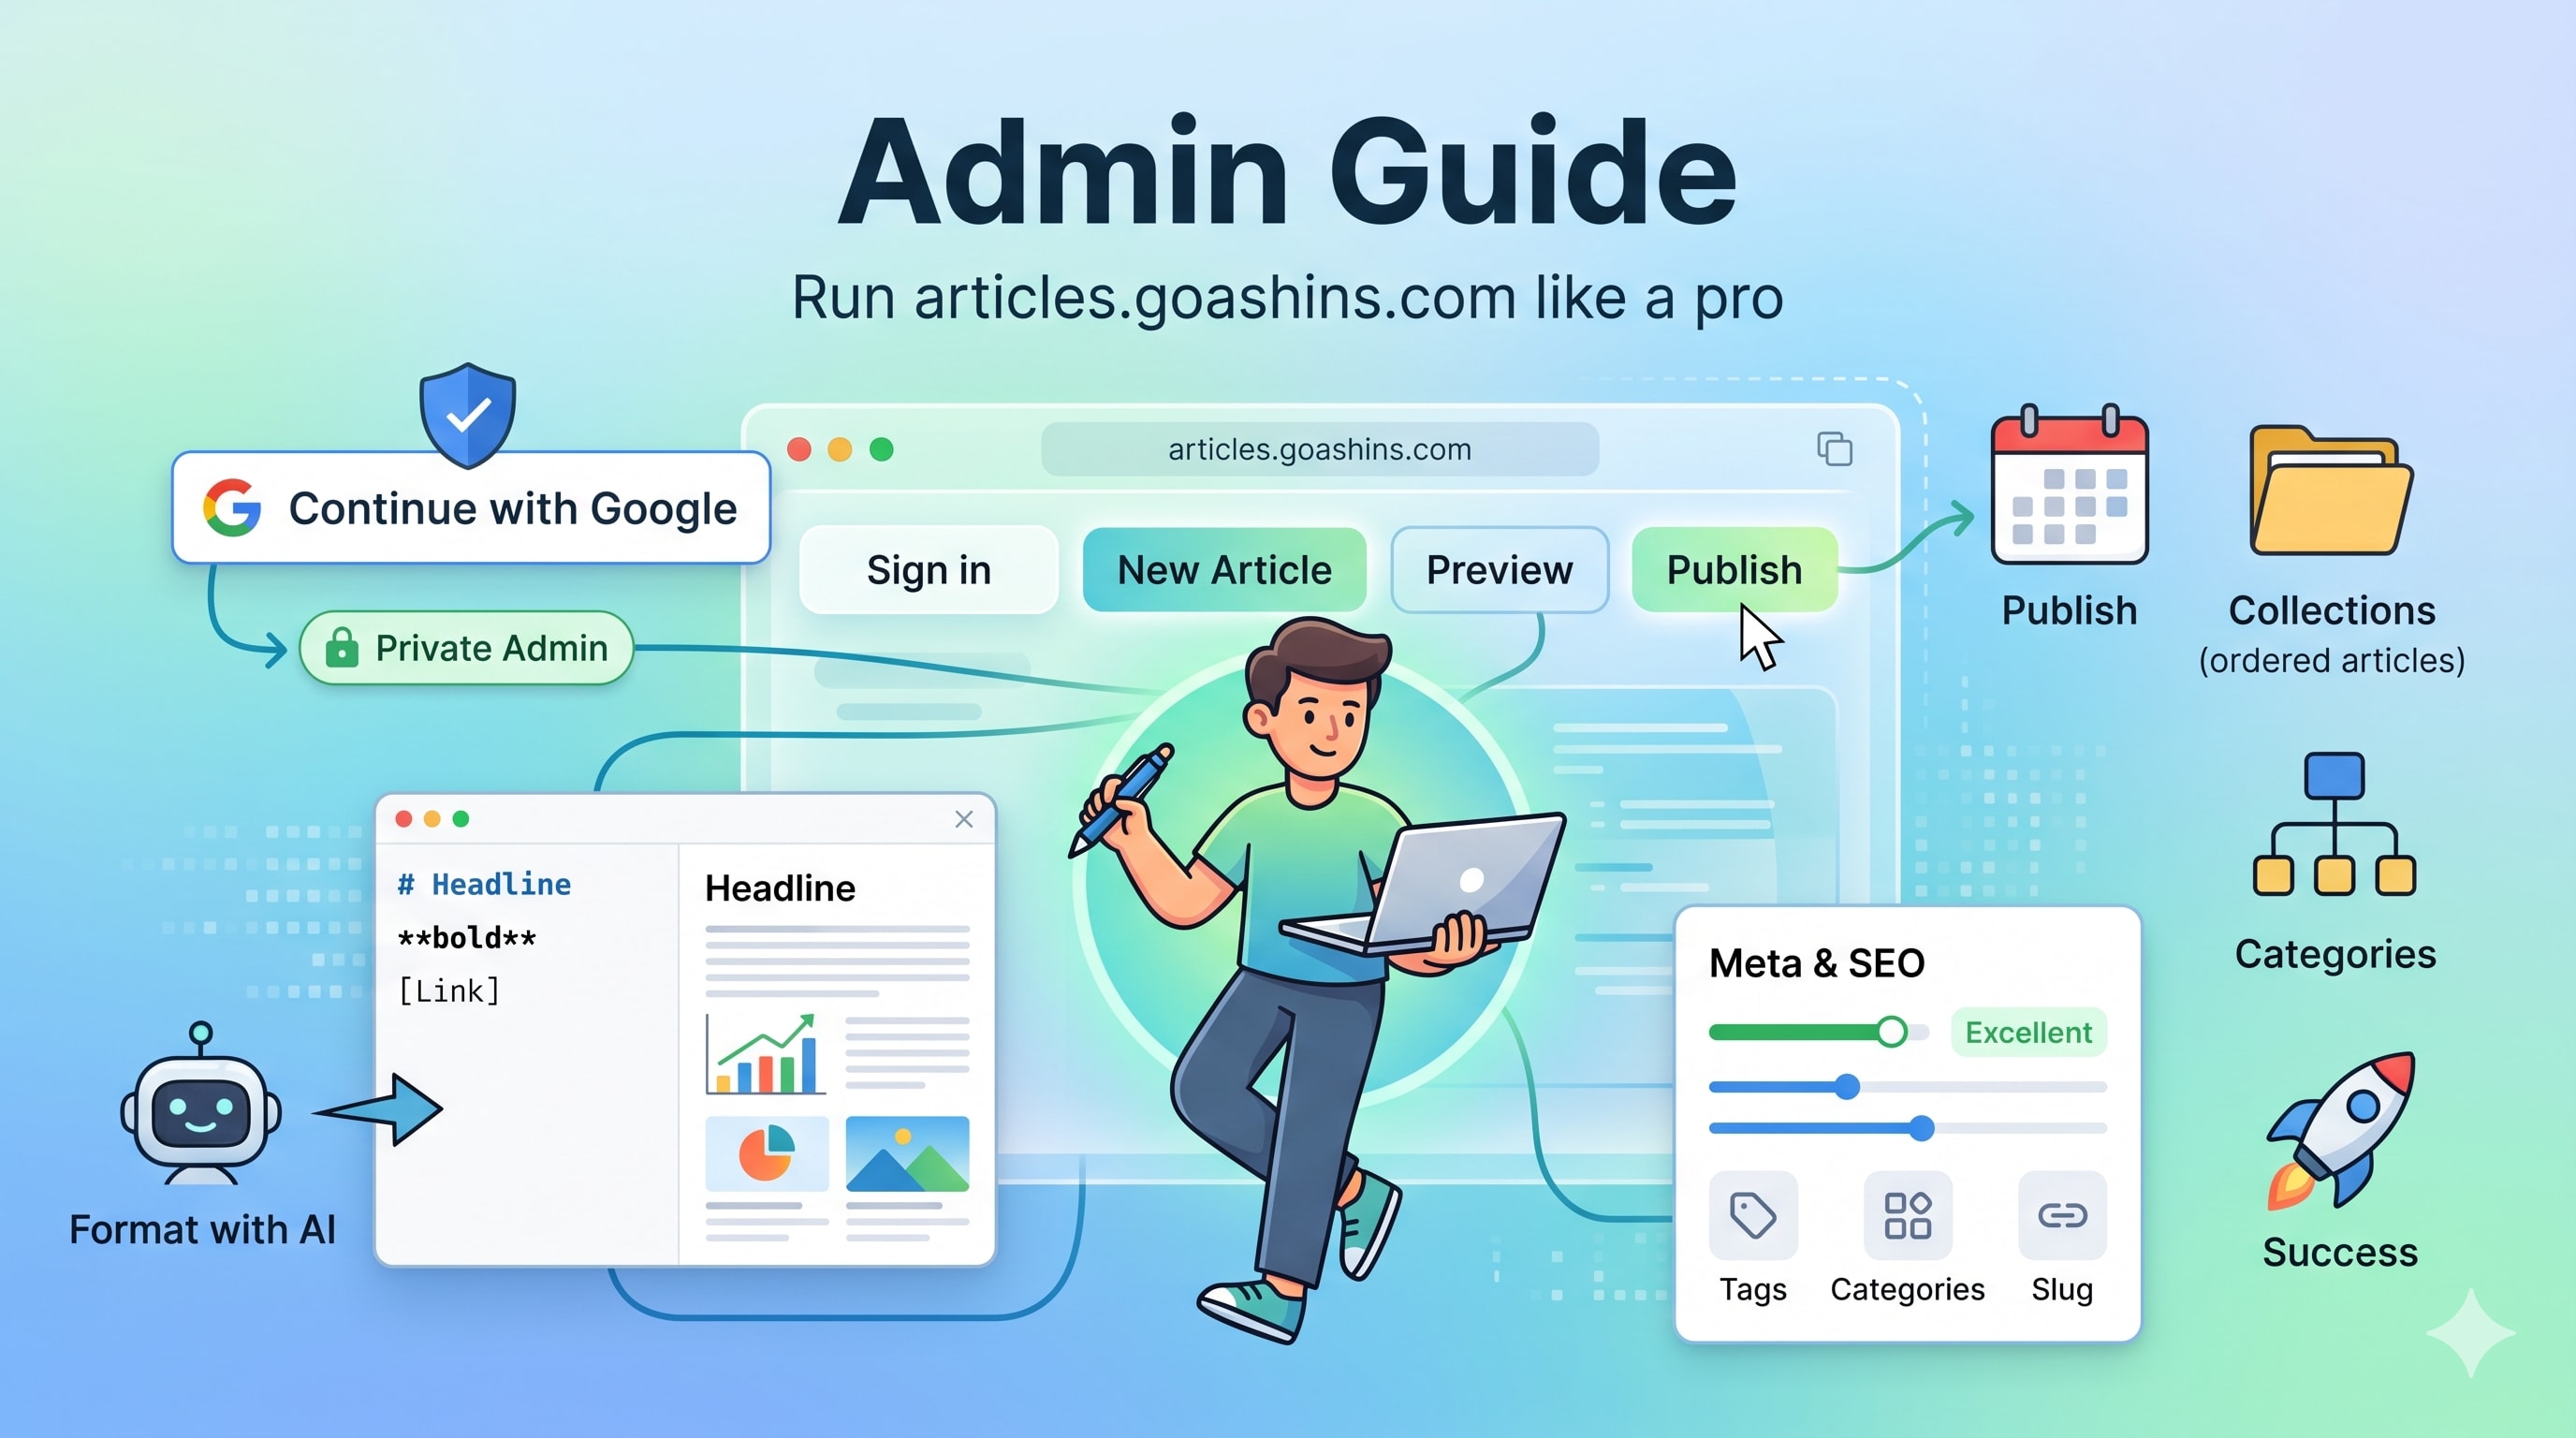
Welcome aboard. This admin guide walks you through everything you need to run articles.goashins.com — from signing in for the first time, to writing and formatting an article, to publishing it and keeping the site organised. Keep it bookmarked; it doubles as a reference once you know your way around.
1. 🔑 Who can sign in#
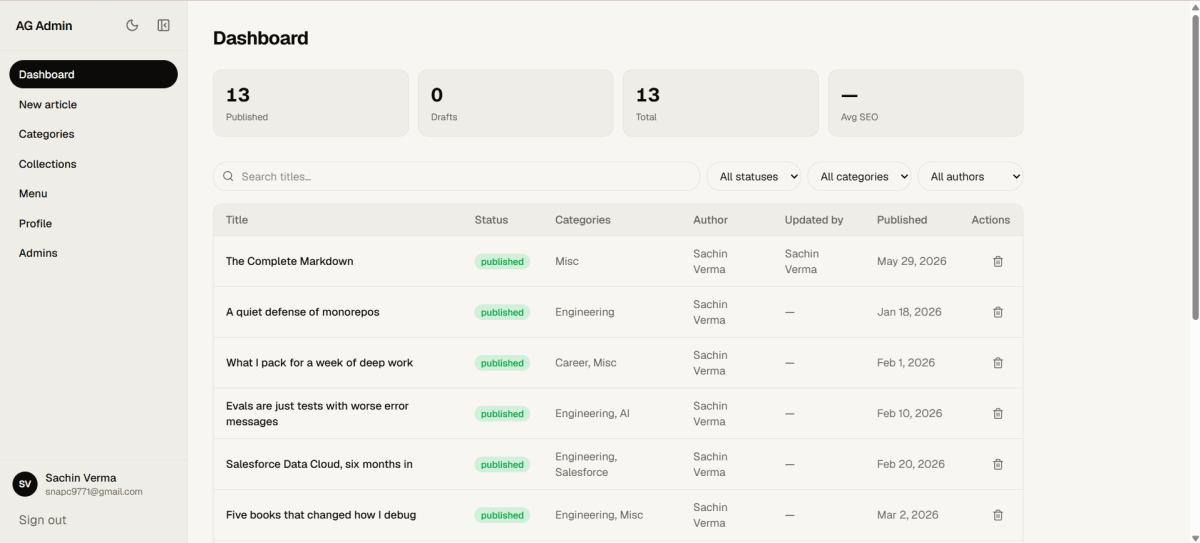
This is a private, invite-only admin. There is no public sign-up — you can only get in if your Google account's email has already been added to the admin list by a primary admin.
There are two kinds of admin:
| Role | Can do |
|---|---|
| Primary admin | Edit and delete any article, plus manage the admin list (add/remove admins). |
| Author (non-primary) | Edit and delete only their own articles. |
Categories, collections, and the header menu are shared — any admin can manage those, regardless of role.
2. 🔓 Signing in#
- Go to
/admin. - Click Continue with Google.
- Pick the Google account whose email is on the admin list.
That's it — there are no passwords to manage. Your session is kept in a secure cookie, so you stay signed in across visits until you log out.
3. 🧭 A tour of the admin panel#
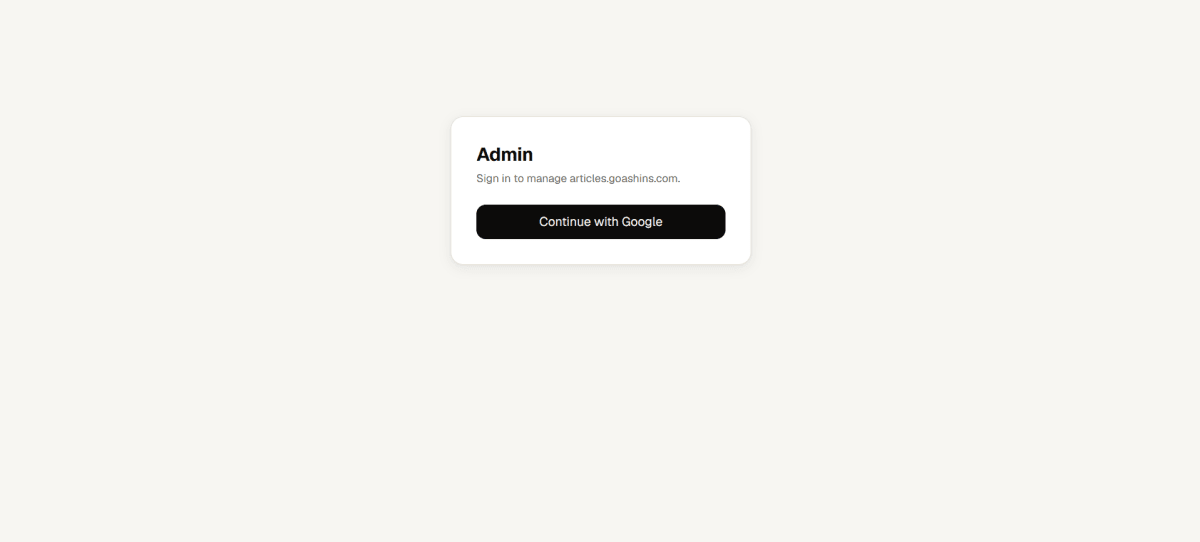
The admin is a single workspace with a collapsible sidebar on the left. The main areas are:
Dashboard — overview of your content, with search, filters, and quick delete.
New article — the editor, for writing a fresh post.
Categories — your topic taxonomy.
Collections — ordered reading lists ("playlists") of articles.
Menu — what appears in the site's header navigation.
Profile — your public author page details.
Admins — the admin list (visible to primary admins only).
4. 📊 The dashboard — managing your content#
The dashboard is your home base. It shows quick stats at the top and a table of every article below.
Search the table by typing — it filters as you go.
Filter by status (draft / published) and other attributes.
Open any article to edit it (subject to the ownership rules above).
Delete an article from its row. Deleting is a two-click confirm — click once to arm, again to confirm — so you can't remove a post by accident.
5. ✍️ Writing an article#
Click New article (or open an existing one) to enter the editor. It has three parts: a title bar at the top, the main editing area, and a Meta panel on the right.
🔀 Two ways to write: Visual and Markdown#
A toggle in the top bar switches between two editing modes. Your choice is remembered in your browser, and both edit the same article — so you can switch any time without losing work.
| Mode | Best for |
|---|---|
| Visual (default) | Writing by clicking, like WordPress or Notion — no markdown to learn. |
| Markdown | Writing markdown directly, with a live preview — if you prefer it. |
🎨 Visual mode (the easy way)#
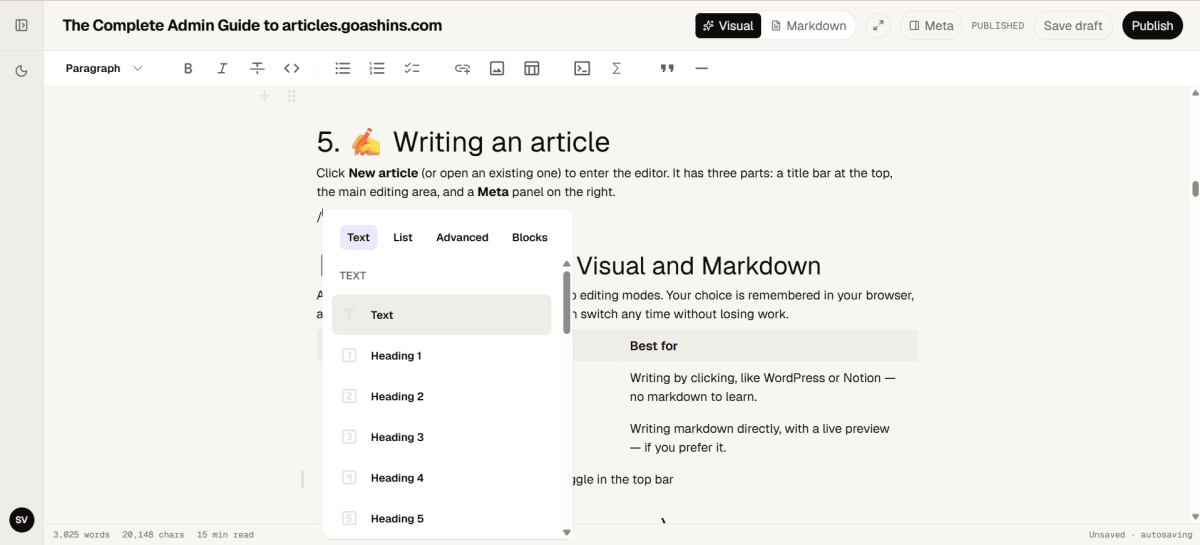
Visual mode is a what-you-see-is-what-you-get canvas — the page looks much like the published article while you write. Just start typing. To add anything beyond plain text:
Press
/on a new line to open the block menu: headings, lists, quotes, code blocks, tables, images, callouts (info / warning / success), a footnote, and embeds (YouTube, X / Twitter, CodePen, and Mermaid diagrams). Choose with the mouse or arrow keys.Select some text to pop up a formatting bar (bold, italic, link, inline code, …). There's also a sticky toolbar across the top.
Reorder blocks by dragging the handle that appears to a block's left.
Paste smartly: paste a YouTube / X / CodePen link and it becomes an embed; paste or drag in an image and it uploads automatically.
Edit an embed or diagram: hover over it and click Edit to change its URL or source.
A couple of things type themselves:
:::info(then a space) starts a callout, and:rocket:turns into 🚀 as you type.
⌨️ Markdown mode (the power way)#
Switch to Markdown to write raw markdown in a real code-style editor with proper undo/redo. It adds three views, chosen with tabs in the top bar:
| View | What you see |
|---|---|
| Write | Just the markdown editor — distraction-free. |
| Split | Editor on the left, live preview on the right. |
| Preview | The rendered article exactly as readers will see it. |
The live preview is the real thing: it renders math, diagrams, code highlighting, and everything else just like the published page.
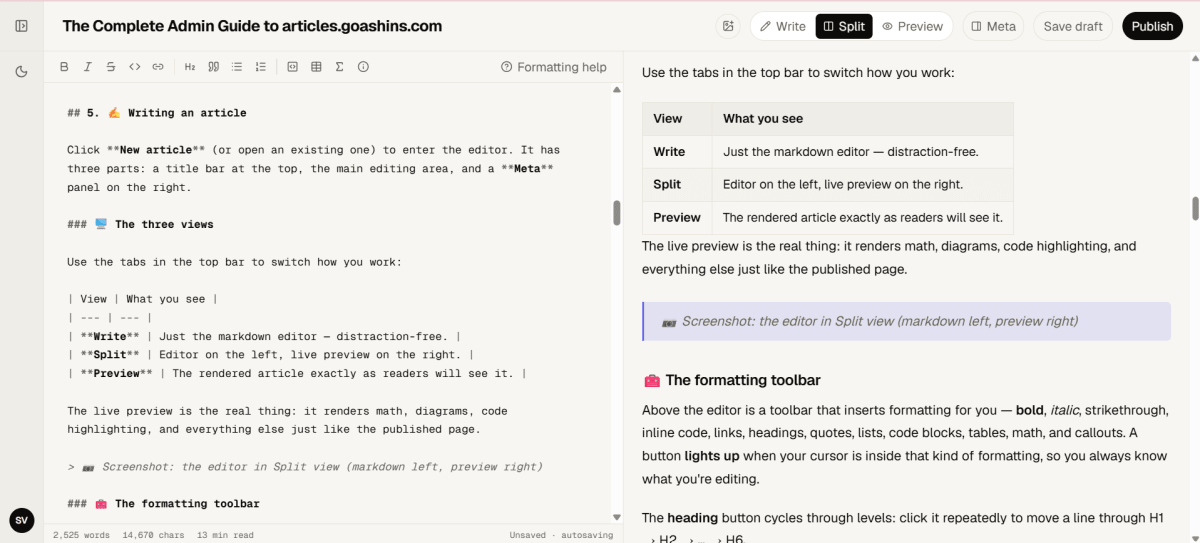
Markdown mode also has a formatting toolbar — bold, italic, strikethrough, inline code, links, headings, quotes, lists, code blocks, tables, math, and callouts. A button lights up when your cursor is inside that kind of formatting, and the heading button cycles a line through H1 → H2 → … → H6.
Handy keyboard shortcuts (Markdown mode):
| Shortcut | Action |
|---|---|
Ctrl/Cmd + B |
Bold |
Ctrl/Cmd + I |
Italic |
Ctrl/Cmd + E |
Inline code |
Ctrl/Cmd + K |
Link |
Tab |
Indent |
Alt + ↑ / ↓ |
Move the current line up / down |
Shift + Alt + ↑ / ↓ |
Duplicate the current line |
Ctrl/Cmd + Z |
Undo (Shift to redo) |
Smart typing helps too: pressing Enter inside a list or quote continues it automatically, and Enter on an empty list item ends the list. Brackets and quotes auto-close, and pasting a URL over selected text turns it into a link.
🔍 Find & replace#
Both modes have Find & replace — press Ctrl/Cmd + F. Type what to find, step through the matches, and optionally replace one or all of them. (In Visual mode a small find bar appears at the top-right of the editor; in Markdown mode it's the code editor's search panel.) Press Esc to close it.
⛶ Fullscreen / distraction-free#
The fullscreen toggle in the top bar expands the editor to fill the whole window so you can focus on writing. Press Esc to exit (works in either mode).
🖼️ Adding images#
Images upload to our media host automatically. You can:
Paste an image straight from your clipboard into the editor.
Drag and drop an image file onto the editor.
In Visual mode, use
/→ Image; in Markdown mode, use the Insert image button in the top bar.
While an image uploads you'll briefly see a placeholder; it's replaced with the real link when the upload finishes. To give an image a caption, set its title (in Visual mode the image block has a caption field) — a standalone captioned image renders as a figure with the caption beneath it. To set the article's cover image, use the Cover image box in the Meta panel.
💾 Drafts, autosave & recovery#
You won't lose work:
Your changes are autosaved to your browser as you type.
If you try to close the tab with unsaved changes, the browser warns you first.
If you return to an article and a newer unsaved version is found, a restore banner offers to bring it back.
The status bar at the bottom of the editor shows your live word count, character count, estimated reading time, and whether your work is saved.

6. 🤖 Let AI do the formatting for you#
Don't want to learn markdown at all? You don't have to. This is the fastest way to write for the platform: focus on your words and let an AI assistant handle the formatting.
- Write your content however is comfortable — plain text, rough notes, bullet points. Don't worry about headings, callouts, or syntax.
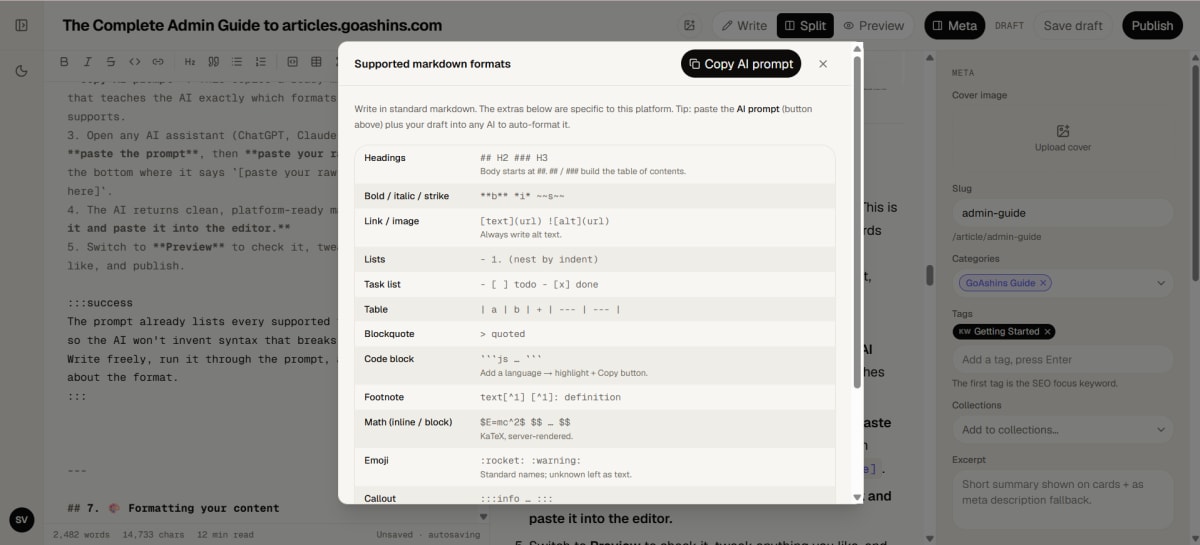
- In the editor toolbar, click Formatting help, then Copy AI prompt. This copies a ready-made instruction that teaches the AI exactly which formats this platform supports.
- Open any AI assistant (ChatGPT, Claude, Gemini, etc.), paste the prompt, then paste your raw content at the bottom where it says
[paste your raw article content here]. - The AI returns clean, platform-ready markdown. Copy it and paste it into the editor.
- Switch to Preview to check it, tweak anything you like, and publish.
7. 🎨 Formatting your content#
Articles are written in markdown (plain CommonMark / GitHub-flavoured markdown), plus a few platform-specific extras. Here's the full toolkit:
The basics — headings (##, ###), **bold**, *italic*, ~~strike~~, links, images, bullet/numbered lists, task lists, tables, blockquotes, and horizontal rules.
Code blocks with syntax highlighting — just add the language:
function greet(name) {
return `Hello, ${name}!`
}Every code block gets a Copy button and a language label automatically.
A table of contents is built for you from your ## and ### headings (it appears when an article has at least three headings), and every heading gets its own shareable anchor link. So structure your article with headings deliberately.
Callouts for asides — three types: info, warning, and success:
:::info
This is an informational note.
:::Math with LaTeX-style syntax — inline like $E = mc^2$, or as a block:
Diagrams with Mermaid — write a mermaid code block and it renders as a diagram:
flowchart LR
  A[Write] --> B[Preview]
  B --> C{Looks good?}
  C -->|Yes| D[Publish]
  C -->|No| A
Emoji with shortcodes like :rocket: → 🚀 and :bulb: → 💡.
Footnotes — add a reference like Some claim.[^1] in your text and define it anywhere with [^1]: the note. References link down to a numbered list at the bottom and back. (In Visual mode, use / → Footnote to insert both at once.)
Image captions — give an image a caption by setting its title: . A standalone captioned image renders as a figure with the caption shown beneath it.
Embeds — paste any of these links on their own line and they turn into a rich embed:
YouTube —
https://youtube.com/watch?v=…(or ayoutu.be/…link).X / Twitter — a post URL like
https://x.com/user/status/….CodePen — a pen URL like
https://codepen.io/user/pen/….
(A link placed inside a sentence stays an ordinary clickable link — only a bare URL alone on a line becomes an embed.)
8. 🧾 The Meta panel#
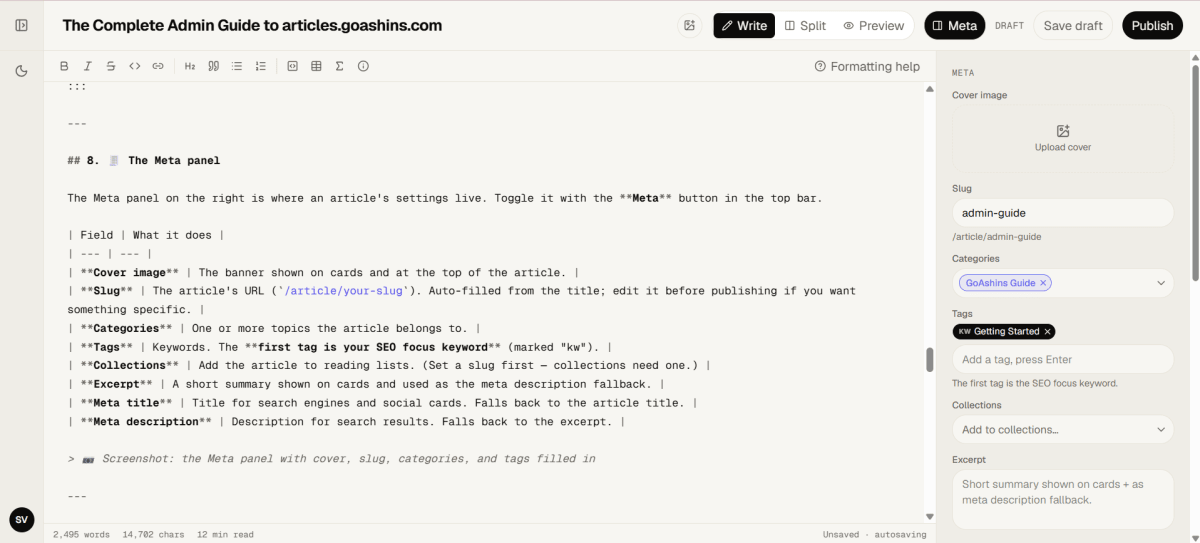
The Meta panel on the right is where an article's settings live. Toggle it with the Meta button in the top bar.
| Field | What it does |
|---|---|
| Cover image | The banner shown on cards and at the top of the article. |
| Slug | The article's URL (/article/your-slug). Auto-filled from the title; edit it before publishing if you want something specific. |
| Categories | One or more topics the article belongs to. |
| Tags | Keywords. The first tag is your SEO focus keyword (marked "kw"). |
| Collections | Add the article to reading lists. (Set a slug first — collections need one.) |
| Excerpt | A short summary shown on cards and used as the meta description fallback. |
| Meta title | Title for search engines and social cards. Falls back to the article title. |
| Meta description | Description for search results. Falls back to the excerpt. |
9. 🎯 Understanding the SEO score#
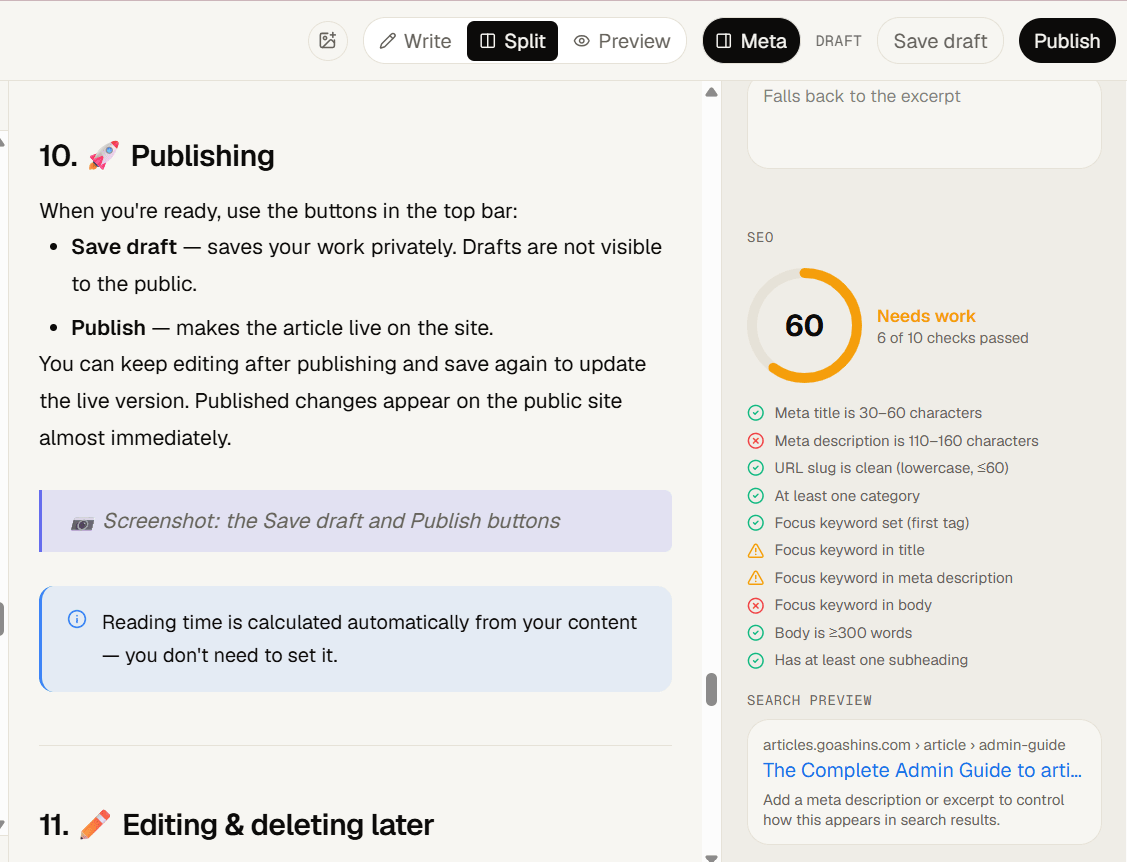
As you write, the SEO panel gives you a live score out of 100 and a grade. It runs ten checks:
| # | Check |
|---|---|
| 1 | Meta title is 30–60 characters |
| 2 | Meta description is 110–160 characters |
| 3 | URL slug is clean (lowercase, ≤ 60 chars) |
| 4 | At least one category |
| 5 | Focus keyword set (the first tag) |
| 6 | Focus keyword appears in the title |
| 7 | Focus keyword appears in the meta description |
| 8 | Focus keyword appears in the body |
| 9 | Body is at least 300 words |
| 10 | Has at least one subheading |
Grades: Excellent (85+), Good (70+), Needs work (50+), Poor (below 50).
10. 🚀 Publishing#
When you're ready, use the buttons in the top bar:
Save draft — saves your work privately. Drafts are not visible to the public.
Publish — makes the article live on the site.
You can keep editing after publishing and save again to update the live version. Published changes appear on the public site almost immediately.
11. ✏️ Editing & deleting later#
Open any article from the dashboard to edit it. Remember the ownership rules:
Authors can edit and delete only the articles they created.
Primary admins can edit and delete any article.
Deleting is always a two-click confirm, and it's permanent.
12. 🗂️ Organising your site#
🏷️ Categories#
Categories are your main topics (e.g. "Engineering", "Design"). Each has a name and a colour used as its accent across the site. Create and manage them in Categories, then assign articles to them from the Meta panel.
📚 Collections#
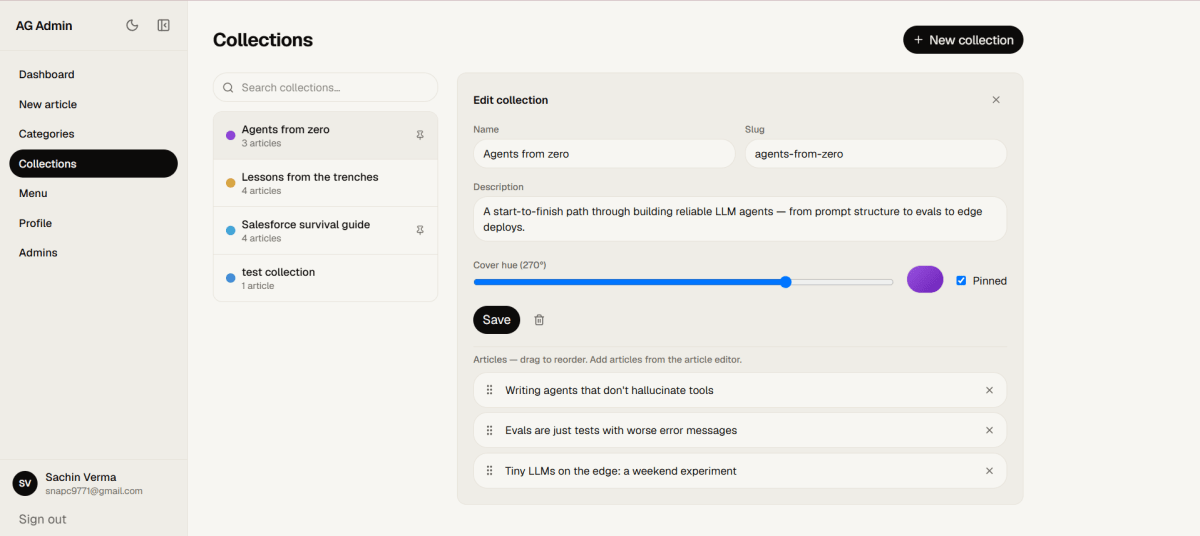
Collections are ordered reading lists — think playlists. Use them to group a series of articles in a deliberate sequence. In Collections you can create a list, add articles, and drag to reorder them. On an article that belongs to a collection, readers get a sidebar showing the whole list and their place in it.
🔝 Header menu#
The Menu section controls what appears in the site's top navigation. You can add plain links or a categories dropdown, and drag items to reorder them.
13. 👤 Your author profile#
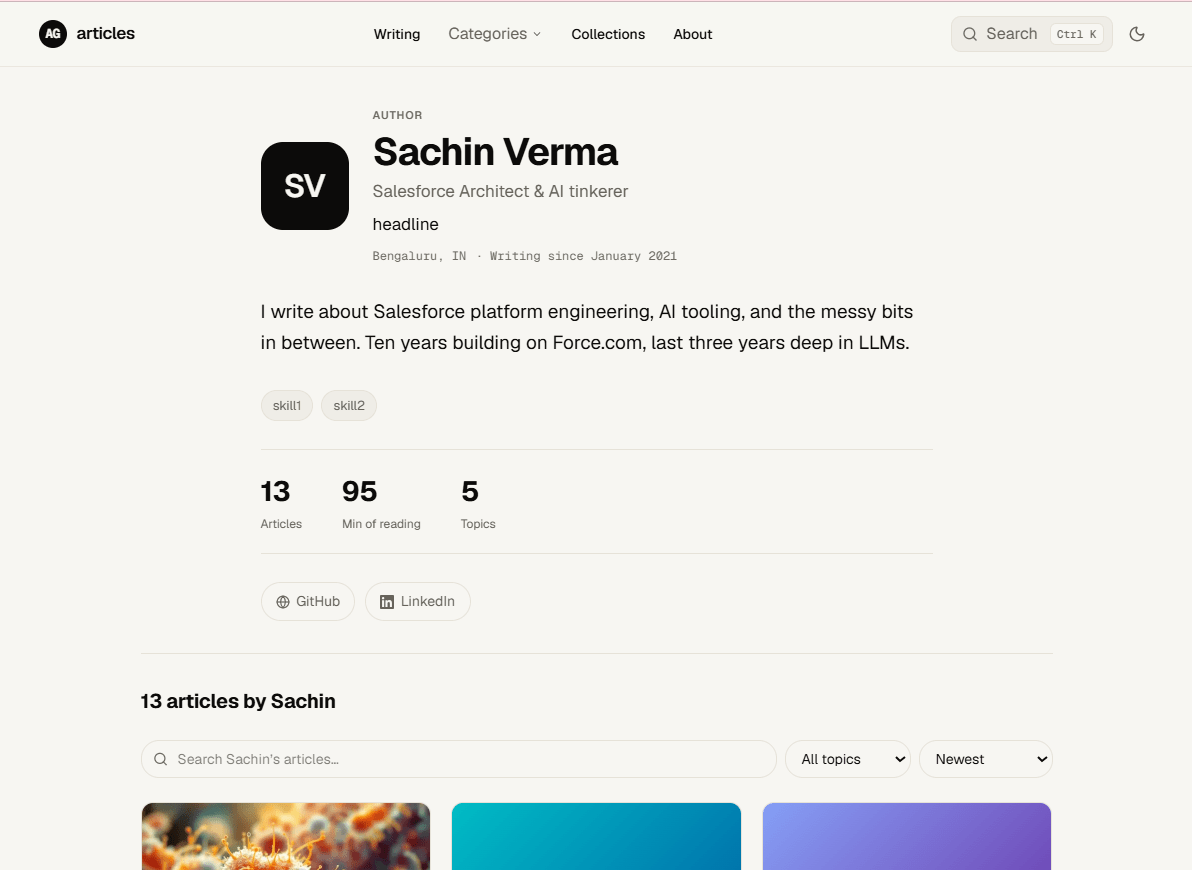
Everything on your public author page comes from Profile:
Name, handle (your
/author/...URL), and roleAvatar photo, headline, and short bio
Location and a public contact email (separate from your login email)
A list of skills, shown as chips
Social links
Every field is optional and simply hidden when left empty, so fill in as much or as little as you like. Your author page is generated automatically from these details.
14. 🛡️ Managing admins (primary admins only)#
If you're a primary admin, the Admins section lets you add or remove people from the admin list. Add someone's exact Google email to grant access; remove it to revoke. Non-primary admins won't see this section at all.
15. ⚡ Quick reference#
Sign in:
/admin→ Continue with Google (your email must be on the admin list).Write: New article → pick Visual (clicks-only; press
/for blocks) or Markdown (raw + Write / Split / Preview).Ctrl/Cmd + Fto find & replace; fullscreen toggle in the top bar.Format: standard markdown + code blocks, callouts (
:::info/warning/success), math, Mermaid, emoji, footnotes, image captions, and embeds (YouTube, X, CodePen). Tap Formatting help for the full list and an AI prompt.Images: paste, drag-drop,
/→ Image (Visual) or the Insert image button (Markdown); caption via the image title; set a cover in the Meta panel.Meta & SEO: fill slug, categories, tags (first = focus keyword), excerpt, and meta fields; aim for a green SEO score.
Publish: Save draft to keep it private, Publish to go live; edit and re-save anytime.
Organise: Categories for topics, Collections for ordered series, Menu for navigation.
Profile: keep your author page details current.
Welcome to the team — now go write something great. 🚀